AWS Lightsail Instance vs Container Service
The most underrated AWS service!
L
Lysander Hernandez
Nov 27, 2025•10 min read
The most underrated AWS service!
Use Lightsail Container Service for most web applications. Easier deployments, automatic HTTPS, no reverse proxy needed, effortless scaling.
Use Lightsail Instance when you need persistent file storage (SQLite databases), custom system configurations, or want to run multiple services or have multiple ports open on one server.
| Feature | Lightsail Instance | Lightsail Container Service |
|---|---|---|
| Starting Price | $5/month | $7/month |
| Minimum Resources | 2 vCPU, 0.5 GB RAM, 20 GB disk | 0.25 vCPU, 0.5 GB RAM |
| Data Transfer | 1 TB included | 500 GB included |
| Persistent Storage | Block storage | External storage only (S3) |
| HTTPS Setup | Manual (nginx/caddy) | Automatic w/ ACM |
| Deployment | Docker compose | Push image |
| AWS SDK authentication | Access Keys | Provider chain |
There are 250 AWS services, which can be intimidating for independent developers like me who want to host their applications in a cost effective manner. Not only do you have to become familiar with their use cases and capabilities, but you also need to know the fine grain pricing details. In the search of affordable hosting solutions, you might stumble upon AWS Lightsail.
To get to the point, Lightsail instances are traditional virtual private servers (VPS) like EC2, but it comes packaged with a minimum of 1 TB of outgoing data transfer, and the control plane allows for effortless methods to attach disks, provision S3 buckets, attach a static IPs, configure DNS for custom domains, create snapshots, and add monitoring through CloudWatch. The cheapest option is $5/month for 2vCPU, 0.5 GB memory, and 20 GB disk storage.
IMPORTANT
The $5.00 only covers the instance and the data transfer, the integrations with other AWS services are priced normally.
Lightsail Container Service is a lightweight version of Elastic Container Service (ECS) that allows you to deploy a container from a single Docker image and not worry about installing dependencies, configuring a reverse proxy, managing certificates, and setting up automatic deployments. You simply push an image stored locally or in a container registry like Elastic Container Registry (ECR). The cheapest plan comes with 0.25 vCPU, 0.5 GB memory, all for $7/month. To talk with a managed database such as DynamoDB, you can configure an IAM role with Lightsail as the principal resource. Then, using something like the Node.js AWS SDK will work out of the box.
NOTE
For using AWS SDK in Lightsail Instances, you will have to resort to more manual methods such as Access Keys
Most of the time, you will want to go with Lightsail Container Service, as the steps to deploy your applications and future maintenance is dramatically reduced. You don’t have to pay for a load balancer unless you need one, and upgrading to a more powerful instance or scaling to more containers is effortless. It is also easier to setup custom domains and enable HTTPS, as you don't need a reverse proxy such as nginx or caddy. However, there are still times Lightsail Instances are appropriate.
Lightsail Container service does not support attaching disks to containers. If you need to persist data, you will need to use an external database or bucket storage depending on your needs. Lightsail Instances support attaching block storage, which I’ve found quite useful when powering applications with SQLite. RDS is really expensive, and while you can run a database on another server, you might as well save costs and supercharge your application’s file system with SQLite. Still, I like to containerize my applications when using Lightsail Instances for easier deployments with Docker compose and to reduce the effort when eventually migrating to a container service.
As a direct competitor to Linode virtual machines and Digital Ocean droplets, I actually think Lightsail is worth recommending as not only does it provide a flat $5.00 for its smallest instance type, but it integrates well with other AWS services and provides a relatively effortless path to upgrade to more mature services such as EC2 or ECS. It also has its own console, which while I prefer the main AWS console, this one neatly has everything you need for web hosting in one place.
So while Lightsail instances are a direct competitor to Digital Ocean's droplets, I strongly encourage developers to try out Lightsail Container service to run their applications. Anytime you need to persist file system data, or need something more than just running a container, use Lightsail instances.
To dive deeper into differences in the experiences of Lightsail Instance and Container service, we will be setting up a Node.js application on both and highlight the differences.
You must create an AWS account and have credentials to use with the AWS CLI. I personally create an IAM User with the AdministratorAccess policy and add the access key and secret access key to ~/.aws/credentials like so:
[default]
aws_access_key_id=AKIA43V3NYUG8VT3THHu
aws_secret_access_key=4asdklfDJn3489G5LqjdasFJu4292134Y89gsfaS
You should also export these environment variables:
export CDK_DEFAULT_ACCOUNT="<YOUR-AWS-ACCOUNT-ID>"
export CDK_DEFAULT_REGION="us-east-1"
As a prerequisite, we'll need to have our web application containerized.
TIP
If you don't have an application created, here is a GitHub repo which uses Tanstack Start which you can clone, or you can pick one out of many examples here. You can also skip this step completely and use my public image on DockerHub in later steps.
git clone https://github.com/uatemycookie22/starter.git .
You can create your own using this command:
npm create @tanstack/start@latest
Ensure build and start npm scripts are present in your package.json file:
    "build": "vite build",
    "start": "node .output/server/index.mjs"
Since we'll need to containerize our application, here is a Dockerfile you can use as a reference
# syntax=docker.io/docker/dockerfile:1
FROM node:22-alpine AS base

# Install dependencies only when needed
FROM base AS deps
# Check https://github.com/nodejs/docker-node/tree/b4117f9333da4138b03a546ec926ef50a31506c3#nodealpine to understand why libc6-compat might be needed.
RUN apk add --no-cache libc6-compat
WORKDIR /app

# Install dependencies based on the preferred package manager
COPY package.json yarn.lock* package-lock.json* pnpm-lock.yaml* .npmrc* ./
RUN \
  if [ -f yarn.lock ]; then yarn --frozen-lockfile; \
  elif [ -f package-lock.json ]; then npm ci; \
  elif [ -f pnpm-lock.yaml ]; then corepack enable pnpm && pnpm i --frozen-lockfile; \
  else echo "Lockfile not found." && exit 1; \
  fi

# Rebuild the source code only when needed
FROM base AS builder
WORKDIR /app
COPY --from=deps /app/node_modules ./node_modules
COPY . .

# Production image, copy all the files and run
FROM base AS runner
WORKDIR /app

ENV NODE_ENV=production

RUN addgroup --system --gid 1001 nodejs

COPY --from=builder /app/.output ./.output

EXPOSE 3000

ENV PORT=

 HOSTNAME=
You can then build and run your container locally
docker build --platform linux/amd64 -t starter .
docker run -di -p 3000:3000 --name starter-local starter:latest
We will need to create another repository to provision the AWS resources using CDK.
TIP
You can use this repository I made which followed the same steps in this tutorial.
git clone https://github.com/uatemycookie22/instance-vs-containers-cdk.git .
In the new repository, run these to initialize the CDK app
npm install -g aws-cdk
cdk init app --language typescript
npm run cdk bootstrap
Afterwards, you will see these files created
├── bin
│   └── cdk.ts
├── cdk.json
├── jest.config.js
├── lib
│   └── cdk-stack.ts
├── package-lock.json
├── package.json
├── README.md
├── test
│   └── cdk.test.ts
└── tsconfig.json
Let's create a stack to define the Lightsail instance. Unfortunately, the Lightsail CDK is not as mature as other services, so we will use mostly L1 constructs here.
Create a new file lightsail-instance-app-stack.ts in the lib directory and paste this:
import * as cdk from 'aws-cdk-lib';
import * as lightsail from 'aws-cdk-lib/aws-lightsail';
import { Construct } from 'constructs';

export class LightsailInstanceApplicationStack extends cdk.Stack {
    public readonly instance: lightsail.CfnInstance;
    public readonly staticIp: lightsail.CfnStaticIp;

    constructor(scope: Construct, id: string, props: cdk.StackProps & { image: string; }) {
        super(scope, id, props);

        // Smallest bundle. $5, 2vCPU, 0.5GB memory, 20GB disk, 1GB transfer
        const bundleId = 'nano_3_0';
        this.instance = new lightsail.CfnInstance(this, 'DemoInstance', {
            instanceName: 'my-new-instance',
            bundleId,
            blueprintId: 'debian_12',
            availabilityZone: ,
            : ,
            : {
                : [
                    { : , : , :  },
                    { : , : , :  },
                    { : , : , :  },
                    { : , : , :  },
                ],
            },
        });


        . =  lightsail.(, , {
            : ,
            : ..,
        });
    }
}
TIP
0.5GB seems too little memory for a web application, and you'd be right, but with an OS like Debian and a daemon-less container tool like podman, this setup uses only 110 MB at idle!
You might have noticed we inputted a command as a prop to the userData field for the CfnInstance. This is known as the launch script, which runs when we start up the instance for the first time, making it useful for installing dependencies, setting up linux users, and even setting up a reverse proxy. You just need to write this script either inline or by using require('fs').readFileSync('/path/to/your/script', 'utf8').
In the ./bin/cdk.ts file, paste this:
#!/usr/bin/env node
import * as cdk from 'aws-cdk-lib/core';

// If you have your own image, use your username.
// Otherwise, feel free to use mine.
const DOCKERHUB_USER = 'uatemycookie';

const app = new cdk.App();

import { LightsailInstanceApplicationStack } from '../lib/lightsail-instance-app-stack';
new LightsailInstanceApplicationStack(app, 'LightsailInstanceApplicationStack', {
  env: { account: process.env.CDK_DEFAULT_ACCOUNT, region: process.env.CDK_DEFAULT_REGION },
  image: `${DOCKERHUB_USER}/starter:latest`
});
Finally, we can deploy the stack:
npm run cdk synth
npm run cdk deploy LightsailInstanceApplicationStack --require-approval never
The CDK for a Lightsail container service is a tad more complex, but with added features.
In a new file lightsail-container-app-stack.ts also in the lib directory, paste this:
import * as cdk from 'aws-cdk-lib';
import * as lightsail from 'aws-cdk-lib/aws-lightsail';
import { Construct } from 'constructs';

export class LightsailContainerApplicationStack extends cdk.Stack {
    public readonly containerService: lightsail.CfnContainer;
    constructor(scope: Construct, id: string, props: cdk.StackProps & { image: string; }) {
        super(scope, id, props);
        this.containerService = new lightsail.CfnContainer(this, 'LightsailContainerService', {
            serviceName: 'my-new-container-service',
            power: 'nano', // $7, 512 MB RAM, 0.25 vCPU
            scale: 1, // Single node
            isDisabled: false,
            privateRegistryAccess: {
                ecrImagePullerRole: {
                    isActive:
                }
            },
            : {
                : [
                    {
                        : ,
                        : props.,
                        : [
                            {
                                : ,
                                :
                            }
                        ],
                    }
                ],
                : {
                    : ,
                    : ,
                    : {
                        : ,
                        : ,
                        : ,
                        : ,
                        : ,
                        :
                    }
                }
            },
        });
    }
}
WARNING
If you are pushing your image to a private ECR repository instead of Docker Hub, you need to have isActive set to true in ecrImagePullerRole. Without it, the container will fail to deploy.
The publicEndpoint field is a neat feature of Lightsail Container service, as it allows you to choose one container to point a public endpoint to. Lightsail will automatically create an HTTPS endpoint, allowing you to test your application before you setup a custom domain configured with SSL.
In the ./bin/cdk.ts file, paste this:
#!/usr/bin/env node
import * as cdk from 'aws-cdk-lib/core';
import { LightsailContainerApplicationStack } from '../lib/lightsail-container-app-stack';

// If you have your own image, use your username.
// Otherwise, feel free to use mine.
const dockerhubUser = 'uatemycookie';

const app = new cdk.App();
new LightsailContainerApplicationStack(app, 'LightsailContainerApplicationStack', {
  env: { account: process.env.CDK_DEFAULT_ACCOUNT, region: process.env.CDK_DEFAULT_REGION },
  image: `${dockerhubUser}/starter:latest`
});
Finally, deploy your stack:
npm run cdk synth
npm run cdk deploy LightsailContainerApplicationStack --require-approval never
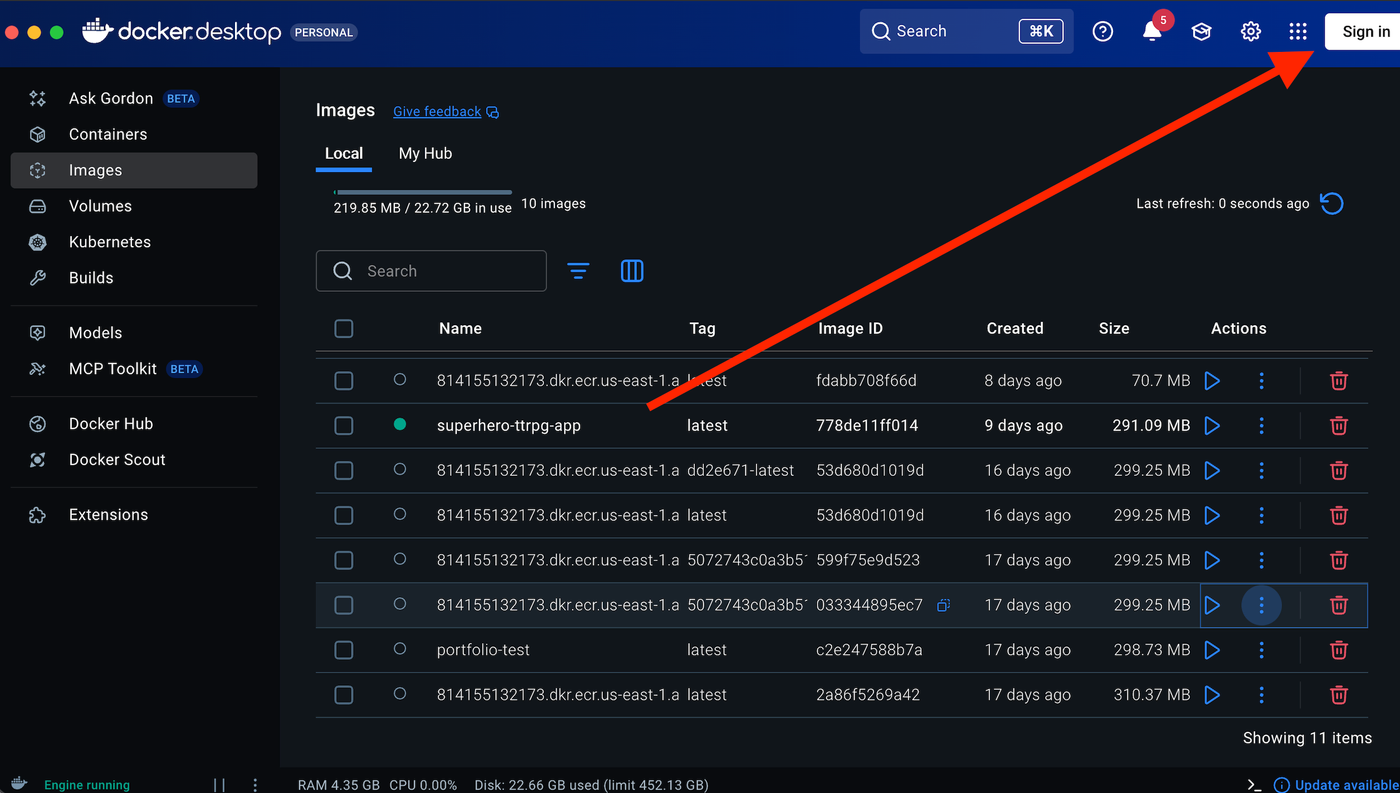
We'll first need tag our previously created image and push it to Docker Hub
docker push starter:latest
docker tag starter:latest <your-dockerhub-username>/starter:latest
docker push <your-dockerhub-username>/starter:latest
The easiest way is to login to your AWS console, go to Lightsail Instance, and SSH through the browser. Pull and run your image
sudo podman run -d -p 3000:3000 --name starter docker.io/<your-dockerhub-username>/starter:latest
TIP
You can use my public image made for this tutorial if you did not create/push your own
sudo podman run -d -p 3000:3000 --name starter docker.io/uatemycookie/starter:latest
You should now be able to connect to your web application on http://<your-instance-static-ip> (e.g curl --connect-timeout 5 http://98.89.94.233)
TIP
You can run this command on your local machine to get your instance's Static IP
aws lightsail get-instance --instance-name my-new-instance --query 'instance.publicIpAddress' --output text --region us-east-1
Deploying your application comes along with deploying your LightsailContainerApplicationStack stack. That's the beauty of Lightsail Container service, deployments are handled for you. Lightsail gives your container a public endpoint which you can see in the Lightsail console.
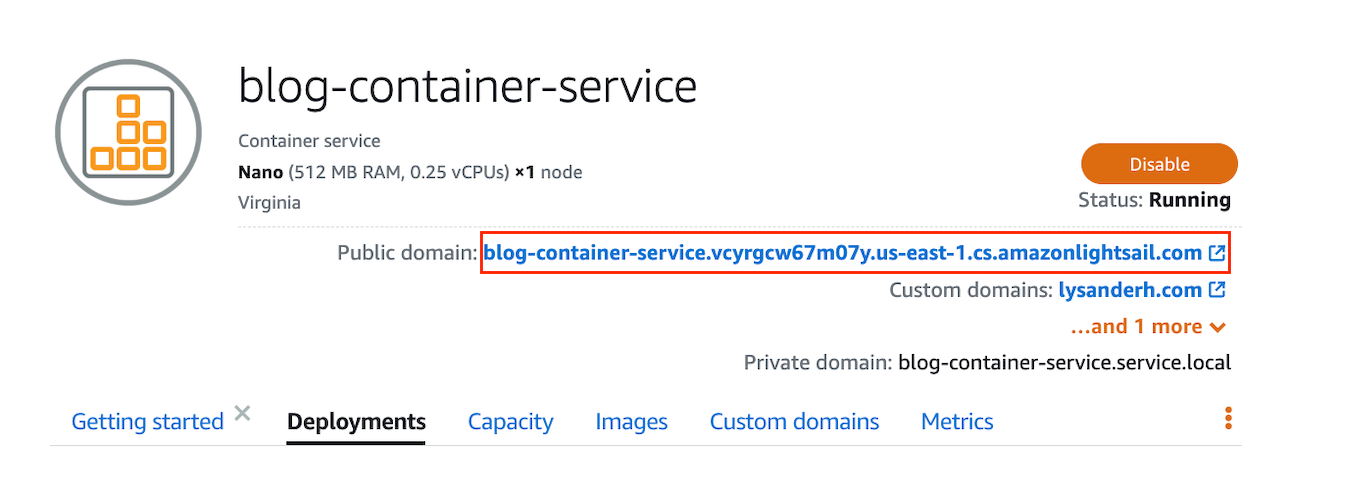
TIP
You can also run this command to see the assigned public endpoint
aws lightsail get-container-services --service-name my-new-container-service --query 'containerServices[0].url' --output text --region us-east-1
If you want to deploy a new version of your application, you rebuild your docker image, tag it, and push it using the same commands from earlier.
Since we used a Static IP with our Lightsail Instance, we can simply use an A record in our domain's DNS configuration and point it to the static IP.
In the Lightsail console, go to your instance and find the 'Static IP address' and copy it:
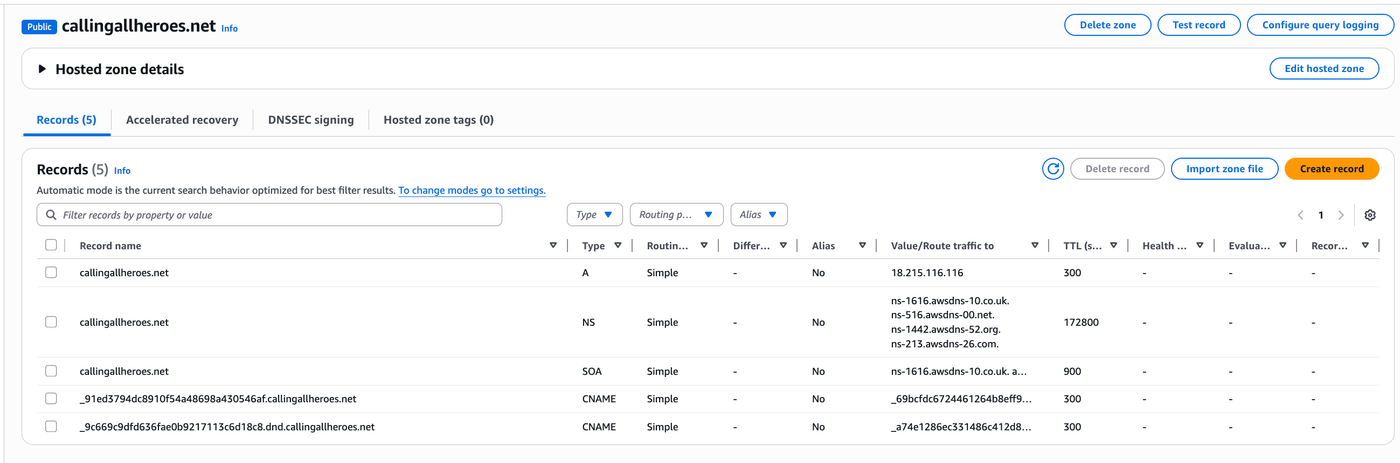
 In either Route53 or Lightsail's own DNS console, create a DNS/Hosted zone if you haven't for your domain and create a record with Type A and paste your Static IP in the
 Value textbox.
Here is an example of my Hosted zone I use for one of my Lightsail instances, where my Static IP is 18.215.116.116:
Enabling HTTPS is easy using caddy. Again, using the browser SSH tool is the easiest method.
Install caddy:
sudo apt install -y debian-keyring debian-archive-keyring apt-transport-https curl curl -1sLf 'https://dl.cloudsmith.io/public/caddy/stable/gpg.key' | sudo gpg --dearmor -o /usr/share/keyrings/caddy-stable-archive-keyring.gpg curl -1sLf 'https://dl.cloudsmith.io/public/caddy/stable/debian.deb.txt' | sudo tee /etc/apt/sources.list.d/caddy-stable.list chmod o+r /usr/share/keyrings/caddy-stable-archive-keyring.gpg chmod o+r /etc/apt/sources.list.d/caddy-stable.list sudo apt update sudo apt install caddy
Then, assuming your application runs on port 3000, replace example.com with your domain and run this:
sudo caddy reverse-proxy --from example.com --to :3000
Afterwards, you should have HTTPS enabled for your domain.
There are some caveats with using a custom domain with Lightsail Container service. Since it does not support Static IPs or Elastic IPs, you cannot point your domain to your container service as they change periodically. This forces you to use Lightsail's DNS, create a DNS zone, and assign your domain to your container service.
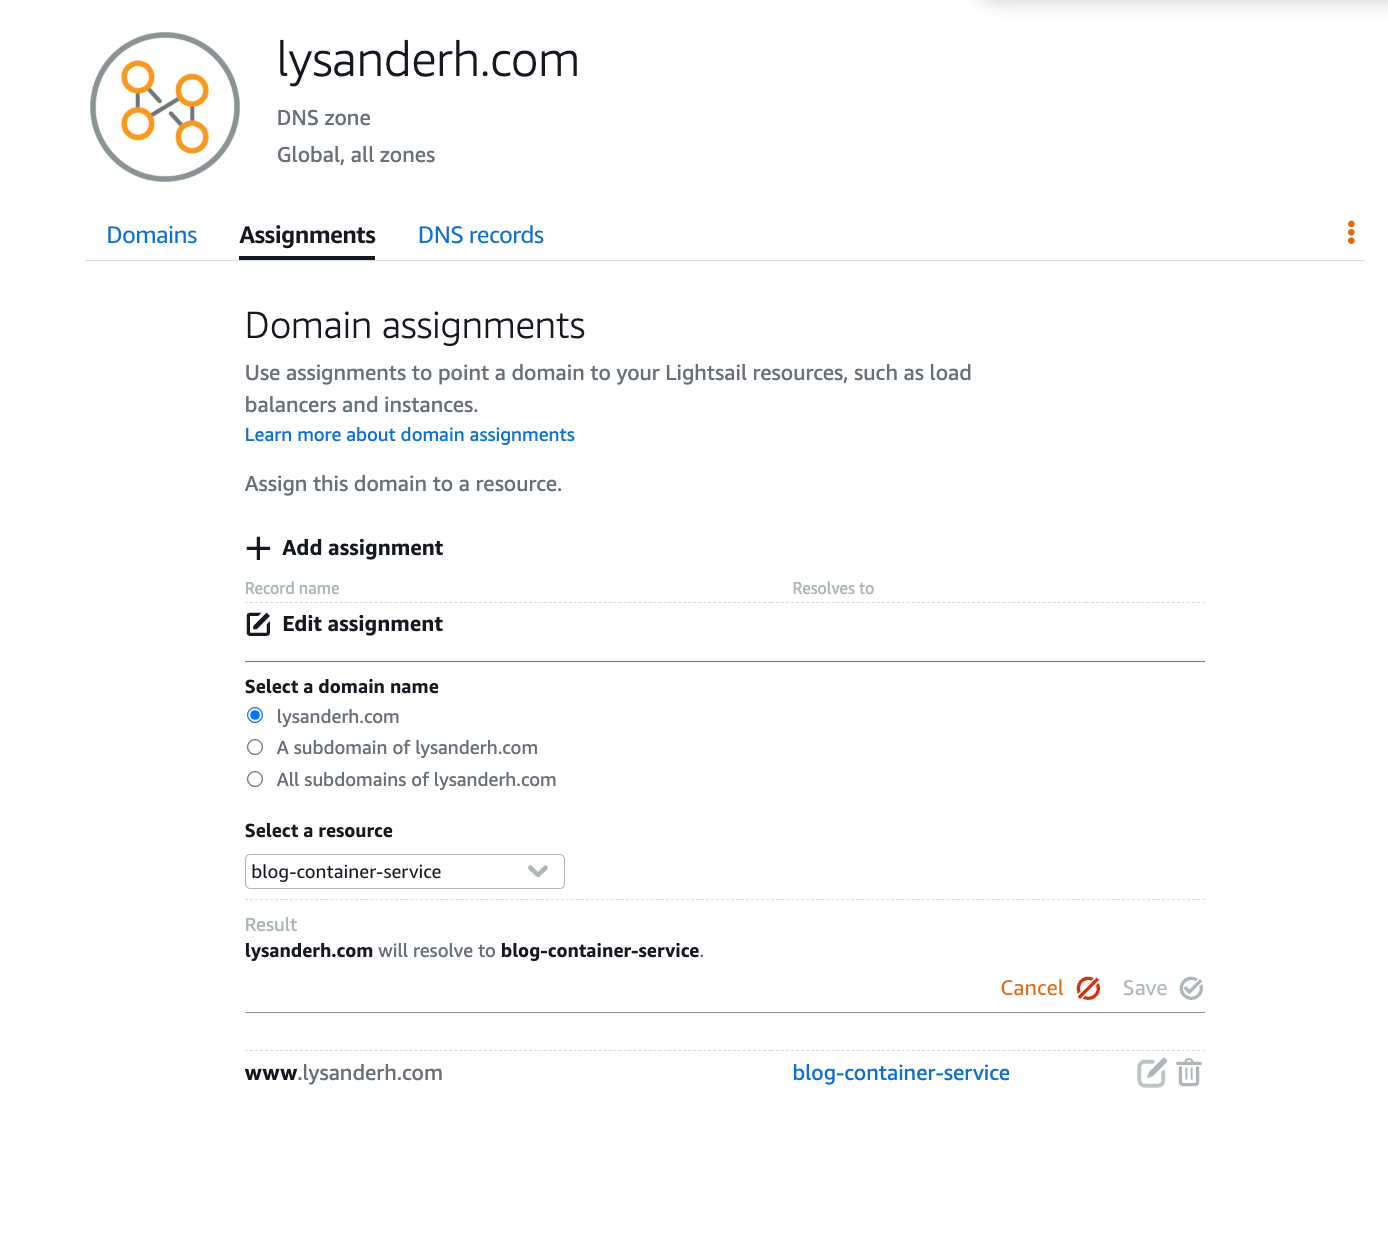
You want to ensure that in the DNS records tab, there is a record of type A that routes traffic from your domain to the container service, and it has the 'Is AWS resource alias' toggle enabled.
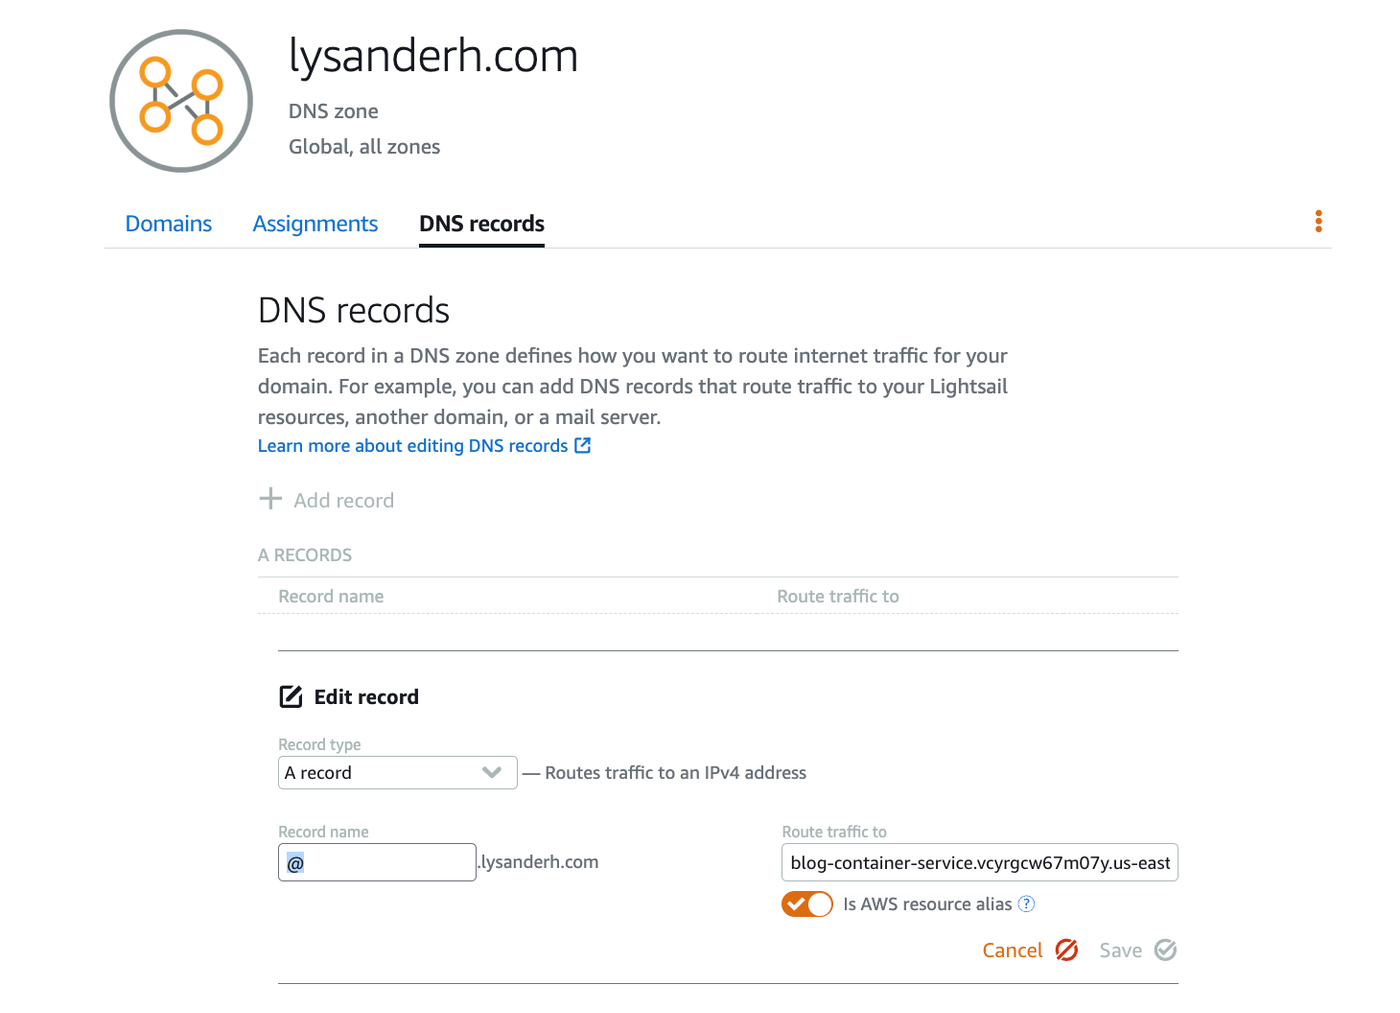
CAUTION
DO NOT use Route53 Hosted Zones to route traffic to your Lightsail Container Service as you cannot route traffic from your apex domain to Lightsail Container Service using an alias. The container service's IP is not static and may change at any time. Use Lightsail's DNS instead.
To enable HTTPS, you can create and attach a certificate. In CDK, you can create an ACM certificate and then fill in the publicDomainNames prop in the CfnContainer construct with the name of the certificate along with your domain name.
const lightsailCertificate = new acm.Certificate(this, 'Certificate', {
  domainName: '<your-domain>',
});

this.containerService = new lightsail.CfnContainer(this, 'LightsailContainerService', {
            serviceName: 'my-new-container-service',
            power: 'nano', // $7, 512 MB RAM, 0.25 vCPU
            scale: 1, // Single node
            isDisabled: false,
            publicDomainNames: [
                {
                    certificateName: lightsailCertificate.certificateName,
                    domainNames: ['<your-domain>'],
                }
            ],
            privateRegistryAccess: {
                ecrImagePullerRole: {
                    isActive: true // Enable ECR private repository access
                }
            },
            containerServiceDeployment: {
                containers: [
                    {
                        containerName: 'foo',
                        image: props.image,
                        ports: [
                            {
                                port: '3000',
                                protocol:
                            }
                        ],
                    }
                ],
                : {
                    : ,
                    : ,
                    : {
                        : ,
                        : ,
                        : ,
                        : ,
                        : ,
                        :
                    }
                }
            },
        });
Run npm run cdk synth && npm run cdk deploy and you should have HTTPS enabled!
Thanks for taking a few minutes to read my blog. It's nice to see the gap in costs between static sites and full stack sites using Tanstack Start and Next.js get smaller and smaller. AWS does not have to be expensive, and the endless integrations with other AWS services with generous free tiers like DynamoDB, CloudFront, Lambda, and many others makes Lightsail a very appealing option for developers on a budget.
My main motive for creating this blog is to share cool ideas with others in computer science topics. No cookies, no paywall, no signing up, just free content to consume at no one's expense.
Comments (0)